fragez_th.jpg

home/turorials

board_o_h_t.jpg
Vertex-defined texturing
board_u_h_t.jpg

fragez_th.jpg

home/turorials


rayt.jpg


channels.jpg

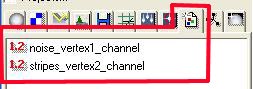
Download Example-project  vertex-mapping.zip

Make two custom float channels called noise_vertex1_channel and stripes_vertex2_channel.

noise_vertex1.jpg

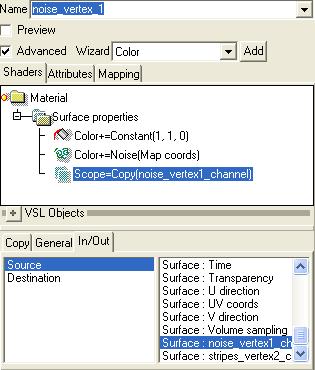
Make a new vsl-material called noise_vertex1 which contains only a surface properties shader with the following attributes:

CONSTANT: yellow (colorvalue= 1,1,0 or rgb 255,255,0) and has in General a "+" set
NOISE: also "+" in general
COPY: which has the defined surface:noise_vertex1_channel as source and Surface:scope as Destination under In/Out-tab in the advanced vsl-settings (this will copy all in the noise_vertex1_channel).

map2obj.jpg

Make a parallel-mapping over the lower left edge of the cube
Make an sds-cube 8x8x2. Switch to edit mode. Select some points of the cube.
Multiselect cube (first) and parallelmapping (second). Switch to materials tab and click on map2obj with the options: Selected points, Map coords, Map coords.

After this you can delete the parallel mapping or if you want to use it again put it in a hidden folder with has under properties-Gen-tab "Invisible in realtime rendering" and "Invisible in photorealistc rendering" activated.


nullmapping.jpg

Now put a default-mapping of the noise-vertex1-material on the sds. In the properties of the mapping under spec-tab set the mapping type to Null.

valuechannel.jpg

Select sds-cube. Switch to edit-mode and select again the points at the the lower left edge.
In the properties of the cube under spec-tab is Attribute. Here you'll find also the channel again "noise_vertex1_channel". You remember that in this channel is the noise_vertex1-shader because of the scope-material with it's output to this channel. For this you can set a value upto 1. 1 means the channel will effect this area with 100%. You can set lower values to make the channel effect less and you can set for each point a different value. If you render it now you will see the yellow-noise-material in the left lower edge.


 stripes_vertex2.jpg

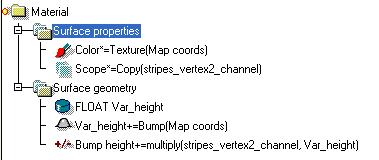
The stripes_vertex2 material

The surface properties shader is a TEXTURE which is assigned like the color in the noise-vertex1 material with a scope COPY in the channel.
Bump mapping has to be a surface geometry shader because surface properties won't work for bumps with NULL mapping. The default bump-mapping which you get if you use the wizard is:
bump_surface_prop.jpg
Exactly this one won't work. You have to build the shader on your own.

make a surface geometry shader like shown in the picture .
- with a FLOAT variable called Var_height
- with a BUMP which has as output the defined variable Var_height and in General a "+"
- with an OPERATION which has as output Surface:Bump height and as Input 0 the custom channel you've made at the beginning surface:stripes_vertex2_channel and as Input 1 the variable Var_height

stripes_vertex2_bump.jpg

Notes to the bump object from Vesa Meskanen

"1. Remember to switch off 'normalize' and 'transform to mat. space' options from the bump map object when it is used in 'surface geometry shader'. These options are related to handling direction vectors, not  a height field.

2. Bump height must be now much smaller, below 0.01 or so. Cubic'  type bumps produce smoothest quality."

oops .. I used 0,022 .. but this also worked .. stripes_vertex2_bump_render.jpg


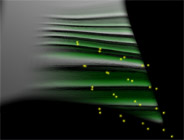
Animating the vertex-map


noise_vertex2_change.jpg

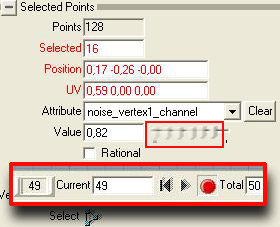
The vertex-mapping is fully animateable with the sds-object applied to. But the texture itself can also be animated. You must only keyframe the change of the value of the applied channel.

For example:
Select some points and Jump to the last frame of an animation, push record and change the value of one Channel from 0 to 1,0. The texture will appear with a very smooth transition depending on the amount of the frames.

Download example-animation (Codec: DivX) 302 kb


copyright © 1996 - 2002 by Boris Jahn

e-mail